IntelliJ Import Dependencies - Getting Started With build.sbt
Overview
In this tutorial, we will show how to use SBT to import external libraries so that we can access and use them in our Scala applications.
As an example, we will import the Scala Logging library to allow us to log statements from our Scala application.
Steps
1. Quick introduction to SBT
- What is SBT?
- What can SBT do?
- It comes with tasks for compiling, running, testing, packing … etc your Scala application.
- More info
- You can refer to the online documentation for SBT and as a matter of fact you would most certainly want to bookmark it. The documentation has useful code snippets to guide you with using various SBT tasks.
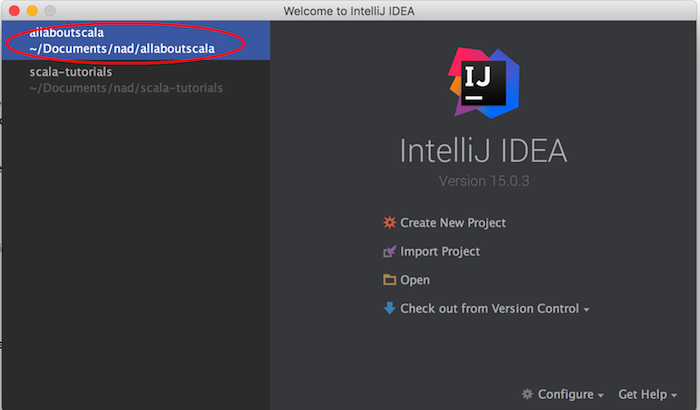
2. Open IntelliJ and our allaboutscala project
If you do not have IntelliJ installed or the allaboutscala project, please follow the previous tutorials.
3. Create a new package and Scala object
Let us name our package com.allaboutscala.chapter.one.tutorial_10 and also create a new Scala object named HelloWorldWithScalaLogging as follows:
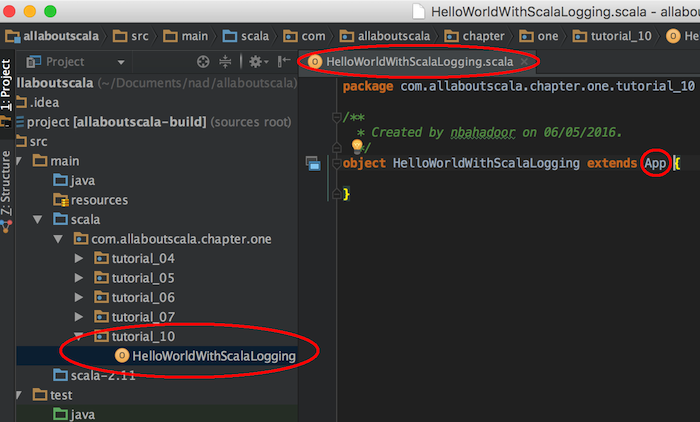
NOTE:
- If you are unsure about how to create package or extend the App trait, feel free to review the Tutorial 4 Your First Scala Hello World Application.
4. Open build.sbt file
If you recall from the Tutorial 8, the build.sbt file is located at the root of our project. Double click on the build.sbt file as shown below.
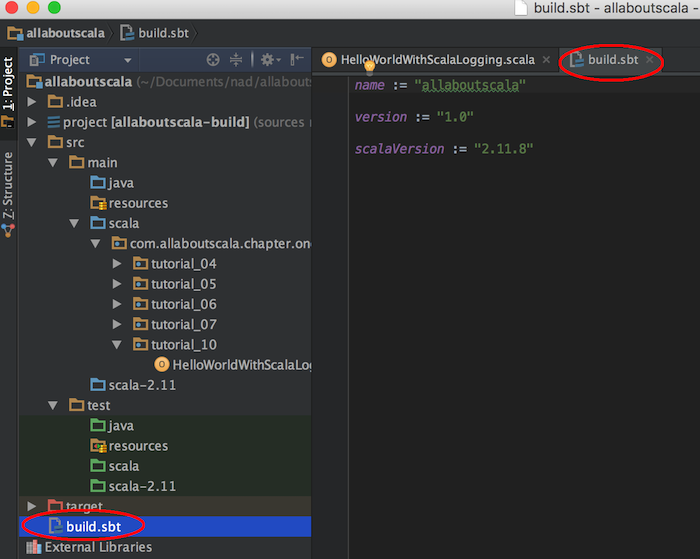
NOTE:
- Our build.sbt file contain a few properties including the name of our application, some default version number and the Scala version which our application is currently targeting.
5. Add Scala Logging dependency
To add the Scala Logging library, you need to add the following library dependencies in build.sbt:
"ch.qos.logback" % "logback-classic" % "1.1.7"
"com.typesafe.scala-logging" %% "scala-logging" % "3.4.0"

NOTE:
- Scala logging also requires a logger such as logback
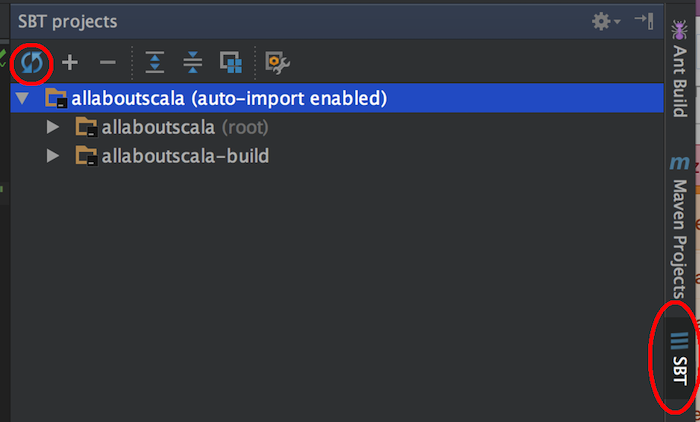
Afterwards save the build.sbt file and you should notice that IntelliJ will start downloading the dependencies. There will be a progress bar in the bottom panel:
![]()
If for some reason IntelliJ does not pull down the dependencies after you've saved the build.sbt file, you can expand the SBT tab in the right panel and click on the refresh button.
6. Verify Scala Logging is in your classpath
To verify that the Scala Logging dependencies are now in our classpath you can open the module settings as described in Tutorial 9. However, let's take another shortcut and expand the External Libraries folder on the left panel:
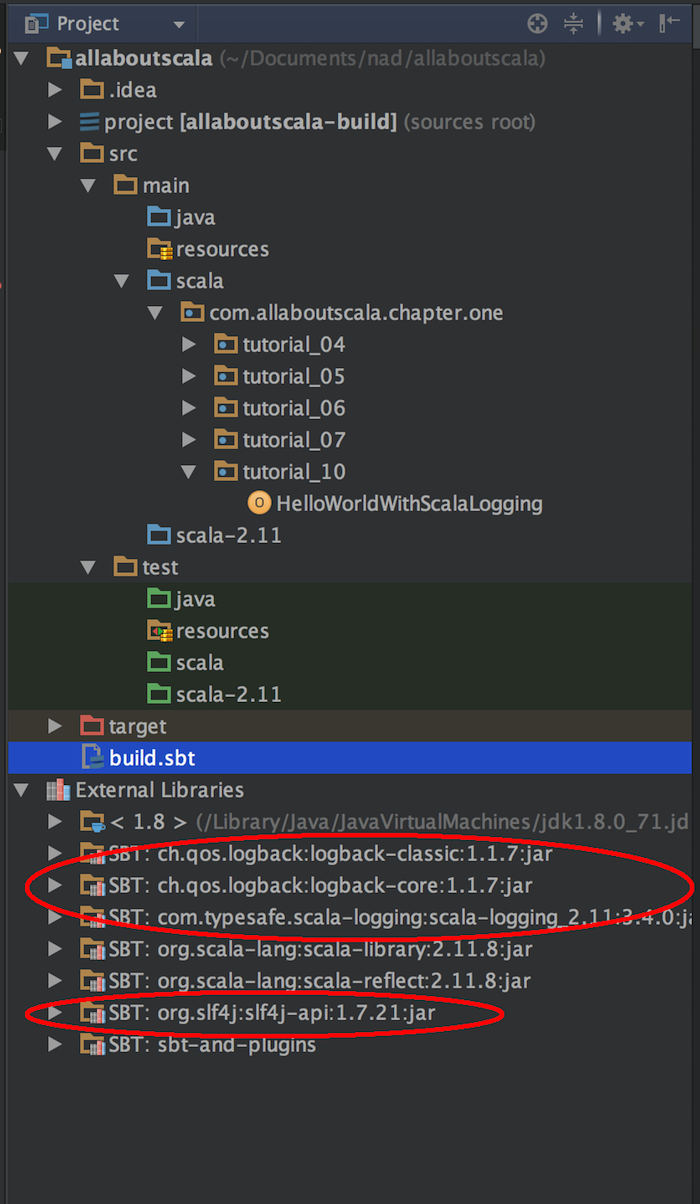
NOTE:
- We now have the relevant dependencies as shown above.
7. Use Scala Logging
If you've followed the previous steps, you should now have access to Scala Logging from your application. So let's use it by adding the LazyLogging trait to our HelloWorldWithScalaLogging application as follows:
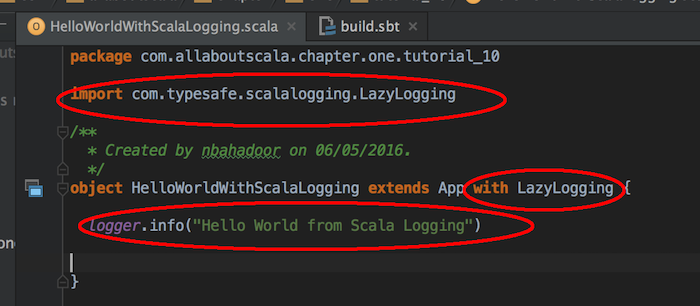
NOTE:
- We have used the with keyword to add the LazyLogging trait. In upcoming tutorials, I will cover the trait and with keyword in more details, but for now think of it as adding extra functionality to our HelloWorldWithScalaLogging application.
- We now also have a logger variable which has an info function that takes a String which in our case is simply "Hello World from Scala Logging".
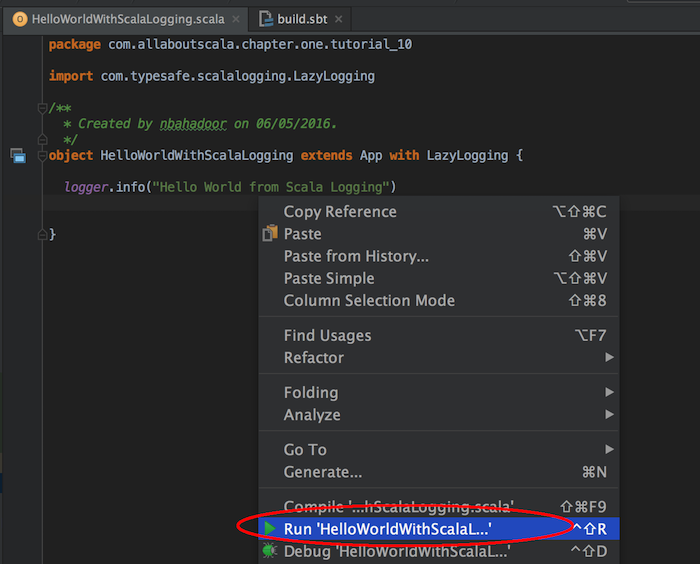
8. Run HelloWorldWithScalaLogging
To run our application, it’s the usual right click anywhere in our HelloWorldWithScalaLogging file and select Run as follows:
In IntelliJ's console window, we will see the output of our application as follows:

NOTE:
- Unlike when we used println() from the previous tutorials, using logger.info() from Scala Logging provides additional prepended data points such as time followed by the function and class where the logger.info() was called.
- Let us not focus on the actual logging configurations, but instead make sure that you've now seen how to add and use external libraries.
This concludes our tutorial on IntelliJ Import Dependencies - Getting Started With build.sbt and I hope you've found it useful!
Stay in touch via Facebook and Twitter for upcoming tutorials.
Don't forget to like and share this page :)
Summary
In this article, we went over the following:
- How to add library dependency in build.sbt file.
- How to check that the dependencies were downloaded and added to our classpath.
- How to import and use Scala Logging.
Tip
- You can find additional information on the Scala Logging utility which we used in this tutorial from the GitHub page.
- You can review our explanation of GitHub from the What is Scala programming language tutorial.
- Another popular build tool which is also used for managing the build life cycle of Scala applications is Gradle.
Source Code
The source code is available on the allaboutscala GitHub repository.
What's Next
In the next tutorial, I will provide a bit more detail on where IntelliJ downloaded our Scala Logging artifact from, along with a brief overview of open source projects.
Stay tuned!


