IntelliJ Project Structure - Scala Project Classpath
Overview
In this tutorial, we will go over how to configure the application classpath for your Scala project in IntelliJ IDEA.
Steps
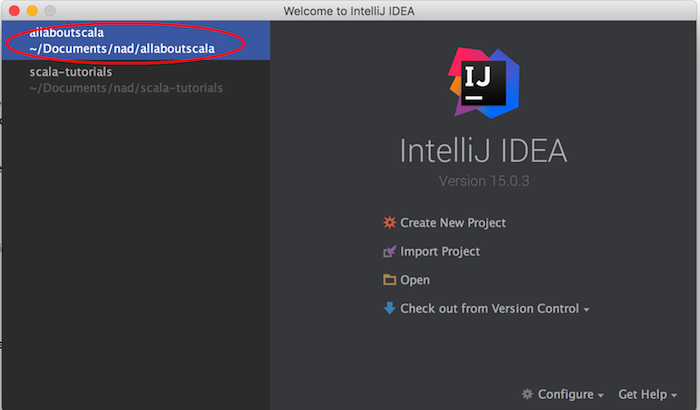
1. Open IntelliJ and our allaboutscala project
If you do not have IntelliJ installed or the allaboutscala project, please follow the previous tutorials.
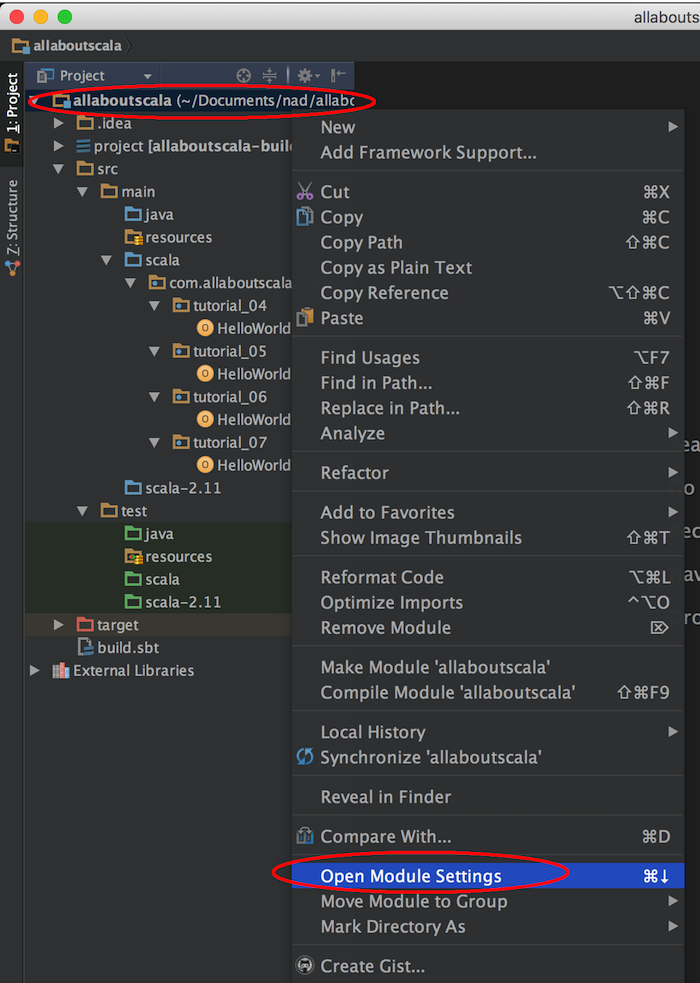
2. Open the module settings for our allaboutscala project
Right click on our allaboutscala project and select Open Module Settings as shown below:
You should see the module settings window with our allaboutscala project selected. Note also that the Sources tab was selected as default.
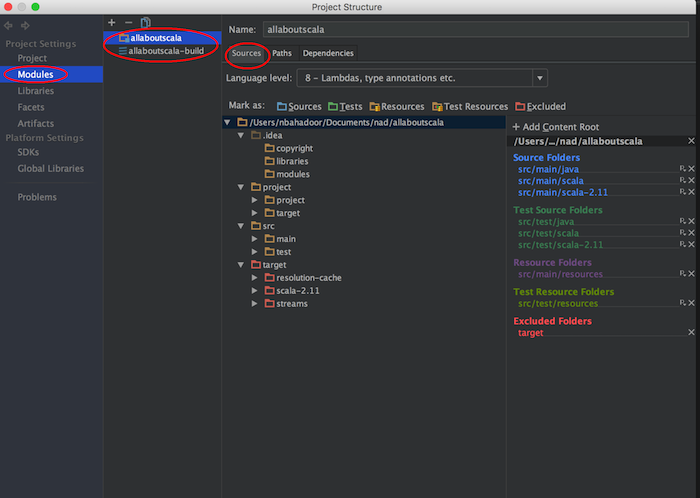
3. Explore the Sources tab
The Sources tab is an important tab which you should get familiar with as it displays the main folder hierarchy for your project as follows:
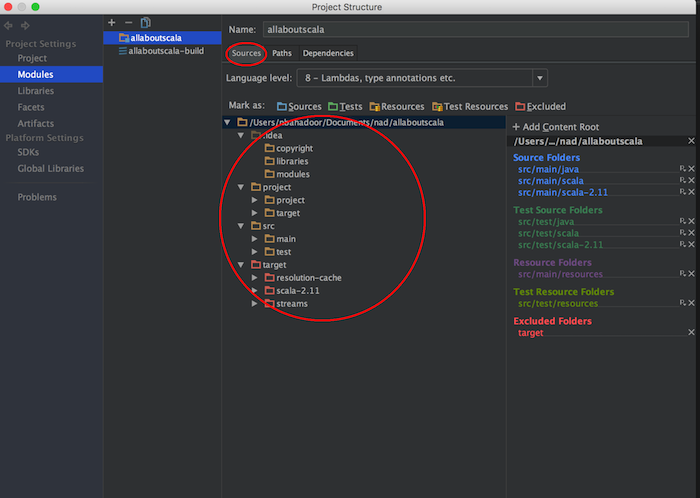
In the right panel, you will also see source folders, test folders and resource folders that would be included in our application classpath. This simply means that when IntelliJ will run your Scala application, it will have access to any files that are included in the above mentioned folders.
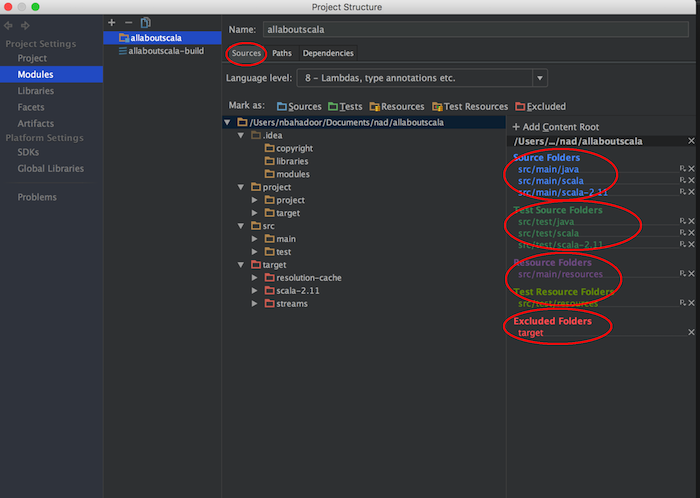
NOTE:
- If you would like to say remove all the test folders so that they are not part of your application classpath, you can simply click on the X button in the right panel.
- The excluded folders currently has the target folder listed. This is by default as the target folder will be the location where IntelliJ will compile and run your Scala application.
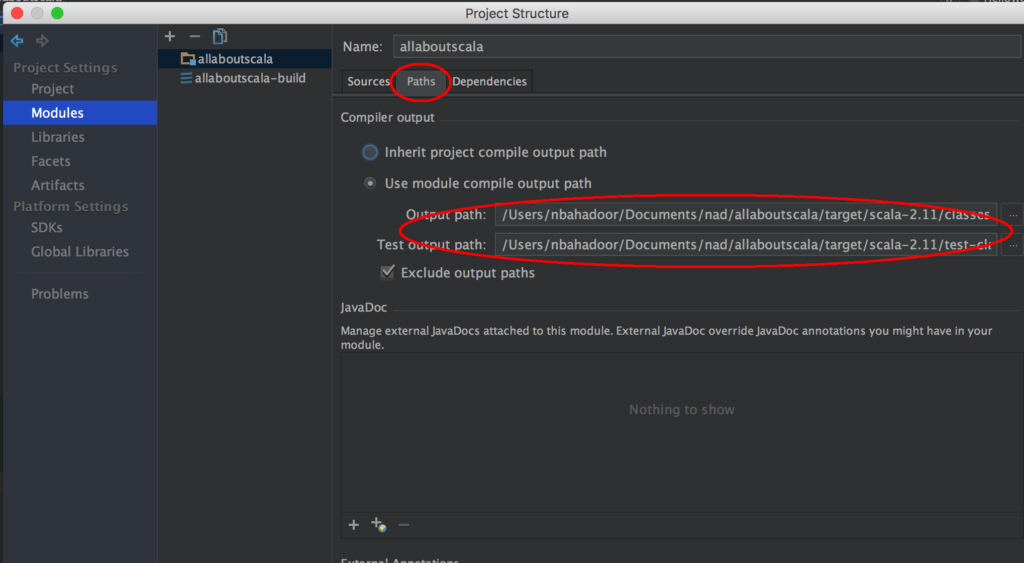
4. Explore the Paths tab
The Paths tab simply displays the location where IntelliJ will put the compiled versions of your Scala files:
5. Explore the Dependencies tab
The Dependencies tab is also another important tab which you should get familiar with as it shows any dependencies such as libraries and jars which are required by your Scala applications:
NOTE:
- In our current example, our Scala application only requires the JDK 8 and the Scala library itself. If you are not familiar with the JDK, feel free to review the tutorial on installing JDK.
This tab also allows you to add any additional external jars, modules and libraries and this can be done by clicking on the + icon as shown below:
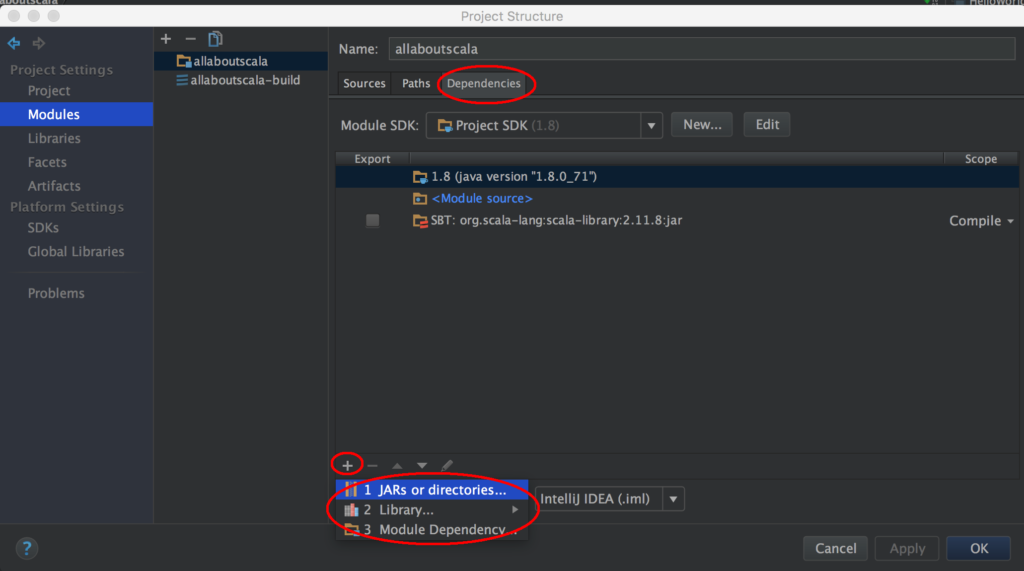
NOTE:
- Importing jars manually is probably not the way forward as it is very error prone. In a production environment you would most likely be importing other dependencies from some internal repository such as Artifactory or Nexus.
This concludes our tutorial on IntelliJ Project Structure - Scala Project Classpath and I hope you've found it useful!
Stay in touch via Facebook and Twitter for upcoming tutorials.
Don't forget to like and share this page :)
Summary
In this article, we went over the following:
- Explored the Sources tab in module settings.
- Explored the Paths tab in module settings.
- Explored the Dependencies tab in module settings.
Tip
- Using SBT makes this process much easier and we will see an example in the next tutorial.
Source Code
The source code is available on the allaboutscala GitHub repository.
What's Next
In the next tutorial, I will show you how to import external dependencies using SBT so that they can be referenced and used in our Scala applications.


