Scala Environment Setup – How to install the Scala plugin in IntelliJ?
Overview
In this tutorial, we will go over how to install the Scala plugin in IntelliJ. The plugin will allow you to create and run your Scala application from the comfort of the IntelliJ IDE code editor. If you are using the most recent IntelliJ IDEA code editor version 2019, use our instructions from this page to install the Scala plugin, accordingly.
But don't worry, installing the plugin is easier than it sounds!
Steps
1. Start IntelliJ
If you have followed the previous tutorials, you should have IntelliJ already installed.
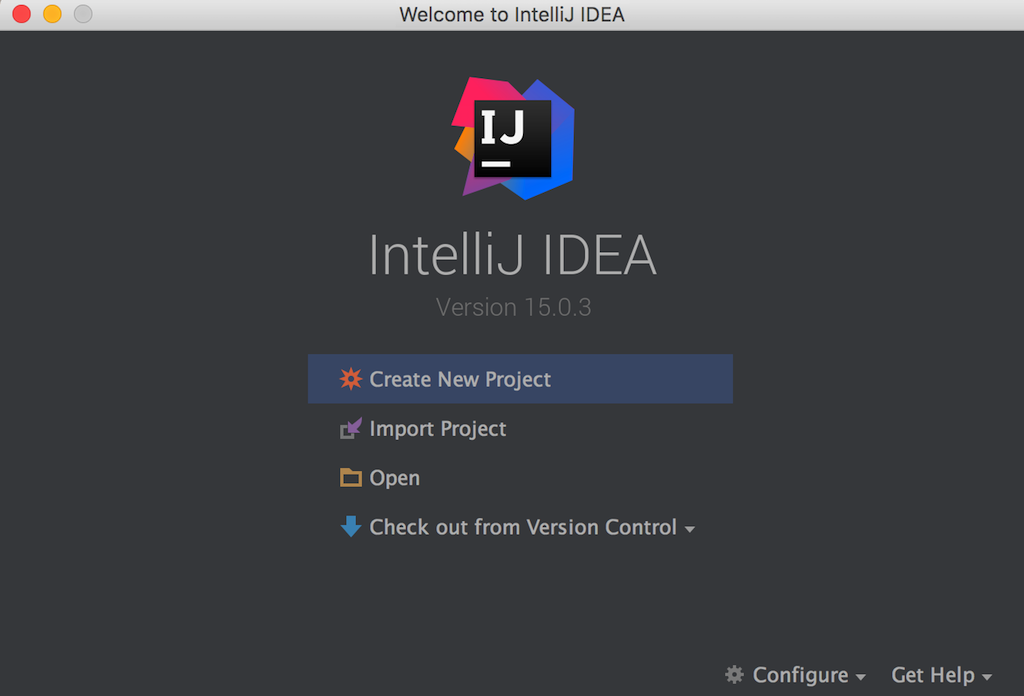
On Mac, click on the icon in your taskbar.

On Windows, click on IntelliJ menu item from your Windows Start menu:

This will open the IntelliJ's welcome window:
NOTE:
- If you don't have IntelliJ installed, just go back and follow the previous tutorials from Chapter 1.
2. Open IntelliJ preferences
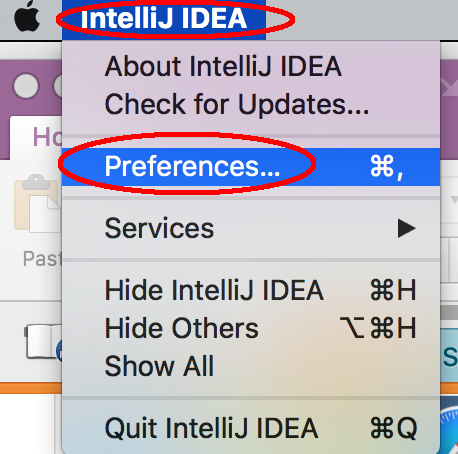
On Mac, click on the menu item IntelliJ and click Preferences:
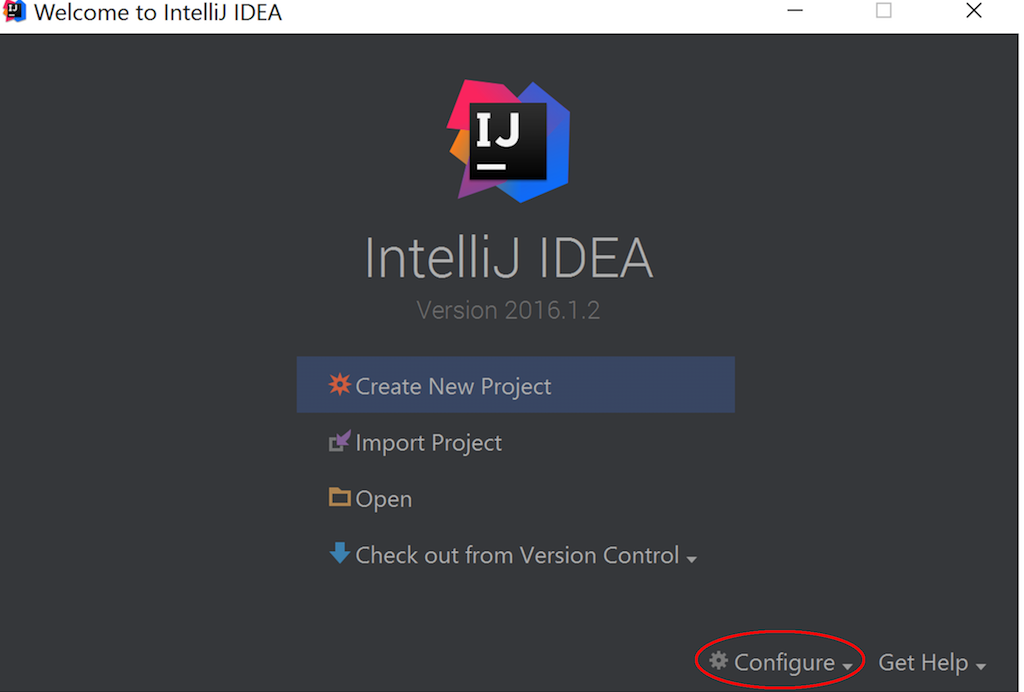
On Windows, click on the Configure and then select the Settings menu item from the Welcome Window in Step 1:
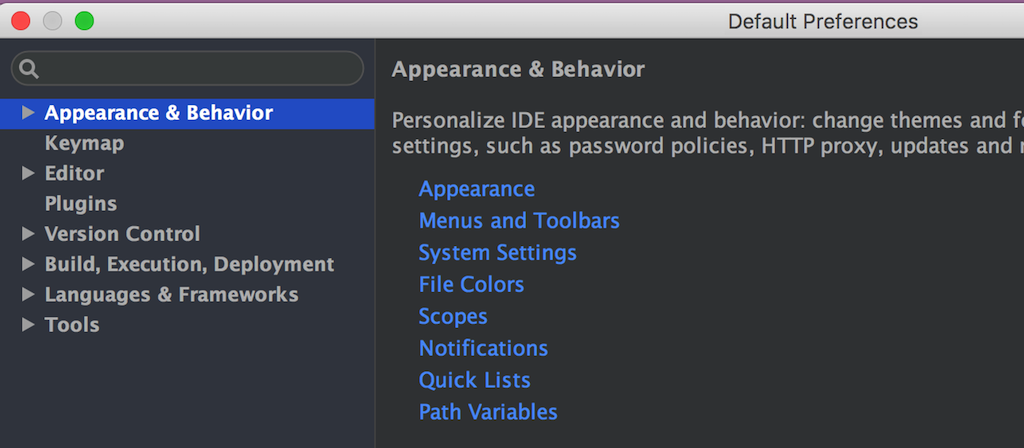
This will open the default preferences window as shown below:
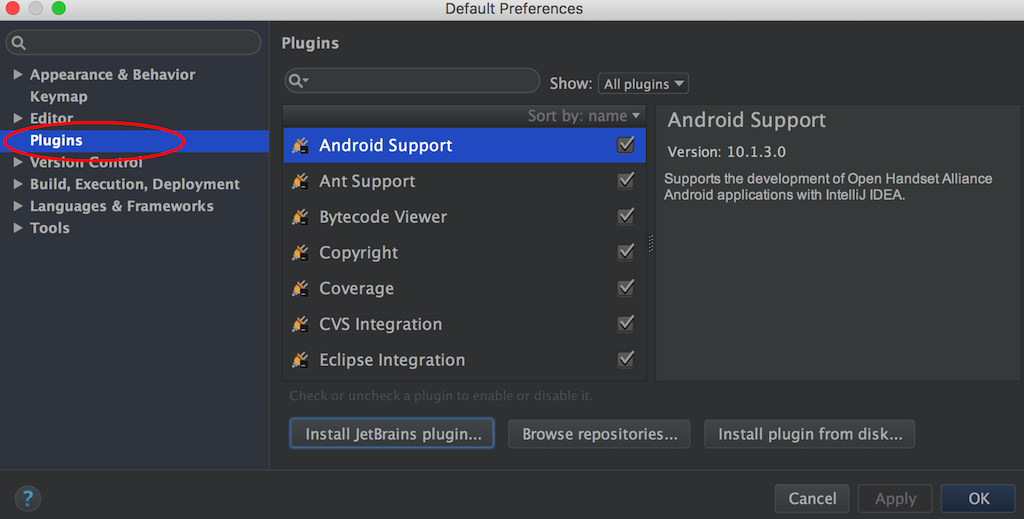
3. Find and install Scala Plugin
In the Default Preferences window from Step 2, click on the Plugins sections on the left panel:
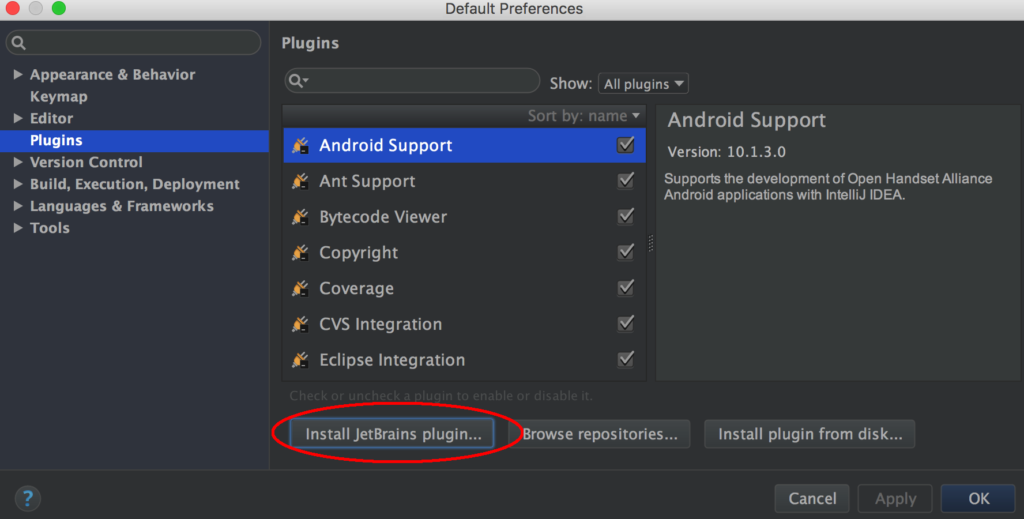
Next, click on the "Install JetBrain plugin…" button:
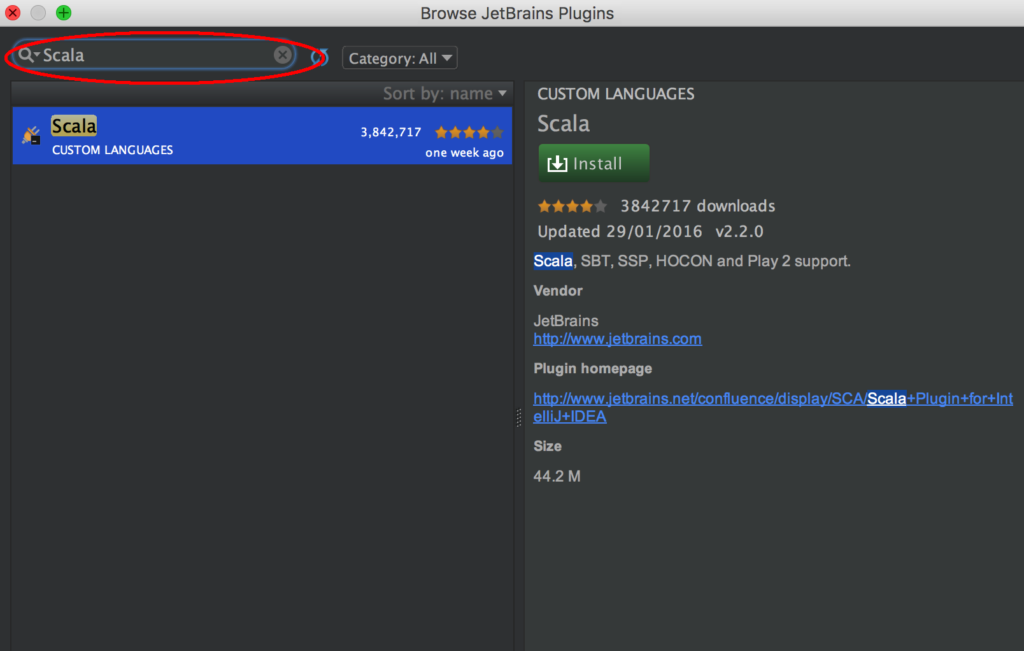
This opens another window which has a search box on the top left corner. Type in Scala in the search box and this will show the Scala plugin which you need to install:
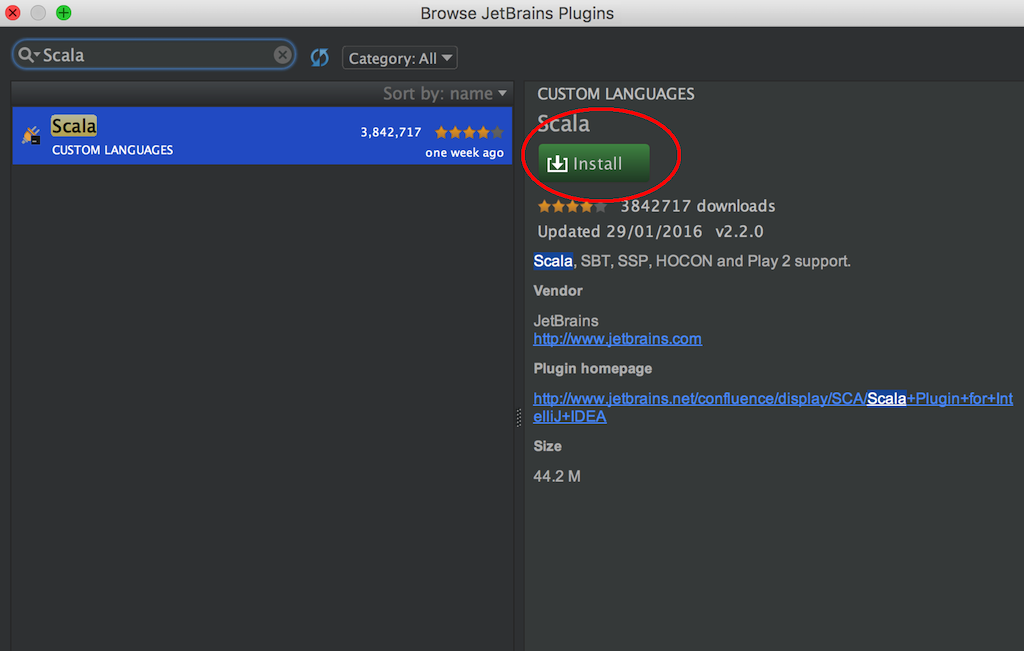
Next, click on the Install button in the right panel to kick off the installation of the Scala plugin:
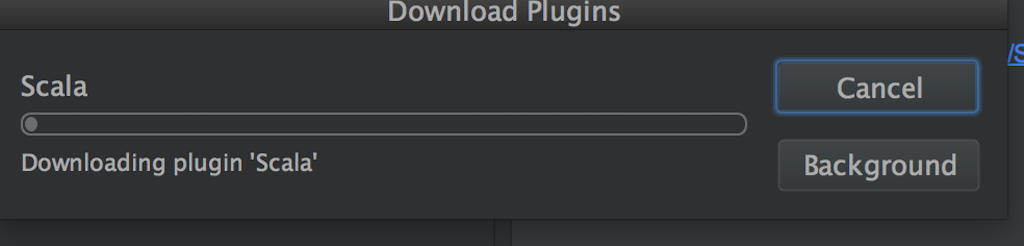
You will see a dialog with the progress for the installation:
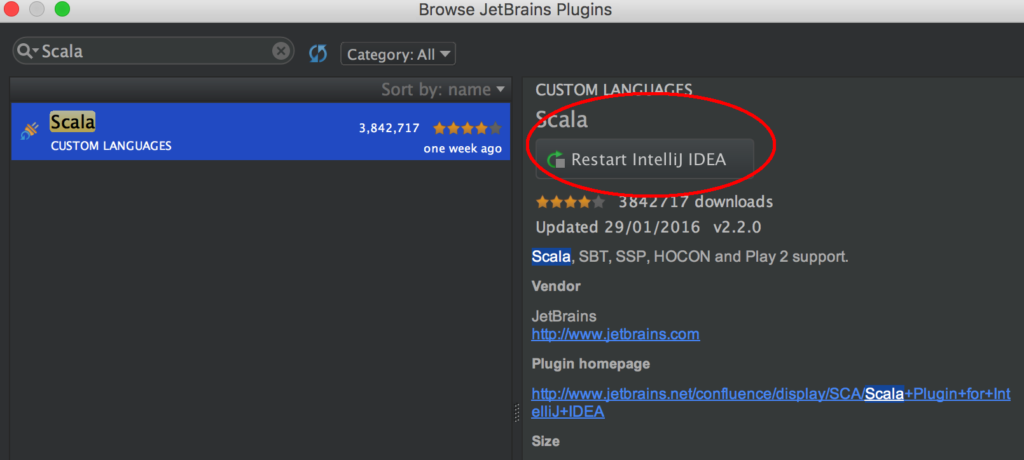
When the installation is completed, you will see a button to restart your IntelliJ IDE. Go ahead and click it to restart your IntelliJ:
That's it! You have successfully installed your first IntelliJ plugin.
This concludes our tutorial on Scala Environment Setup - How to install the Scala plugin in IntelliJ and I hope you've found it useful!
Stay in touch via Facebook and Twitter for upcoming tutorials.
Don't forget to like and share this page :)
Summary
In this article, we went over the following:
- How to install the Scala plugin in IntelliJ.
Tip
- I'm sure as you progress in your career as a developer, you will be installing additional plugins in IntelliJ. But now you know how to install plugins!
Source Code
The source code is available on the allaboutscala GitHub repository.
What's Next
In the next tutorial, you will write your first Scala application which will be a simple Hello World application. But, you will be using your IntelliJ IDE and the Scala plugin that we have installed in this tutorial.
Stay tuned!


Share this article on